is all you need to pull off quality videos with no budget. I'll show you.
Anna Akana
ANNA’S YOUTUBE CHANNEL
So far I have shot over 120 videos for the lovely Anna Akana. The playlist above contains the comprehensive collection. We have employed varying degrees of equipment and crew, but all of the videos that take place in her apartment use only one light kit or less and no additional crew. I’ll use a few as examples below to give a behind-the-scenes look on how we make her digs look oh-so-glamorous.
*UPDATED SETUP*
CREW: We have a crew now! It’s me, two grips and one grip/sound person
LIGHTING: Aputure LEDs, Arri 650, Arri 300
CAMERA: Canon C200 with Zeiss ZE 50mm f/1.4 lens.
Though the fundamentals of the setup are the same (3-point lighting plus background accents), I started making subtle changes that have a big impact on the feel of the final image, while still maintaining the overall look that Anna likes. Two major changes were the camera and lenses. I’m now shooting RAW 4K with my Canon C200 and grading in ACES using Resolve.The camera and lights are all balanced to 3200K. Key light is an Aputure 120t with a Light Dome. The fill is a book light, using a 120t bounced into a flex fill, then diffused through a white bed sheet. It’s much more cumbersome than before, but it’s super soft and it eliminates a second eye light. The backlight is an Aputure LS-1c with opal diffusion. I have an LS-1s (daylight-balanced) with full CTO on the ground, bounced into a bead board that helps light up the background since the new paint is very dark. There is an Arri 300 pointed at the wall to create a glow behind Anna’s head and there is an Arri 650 hitting the cat in the background to augment the practical.Book light from the side.
THE EVOLUTION
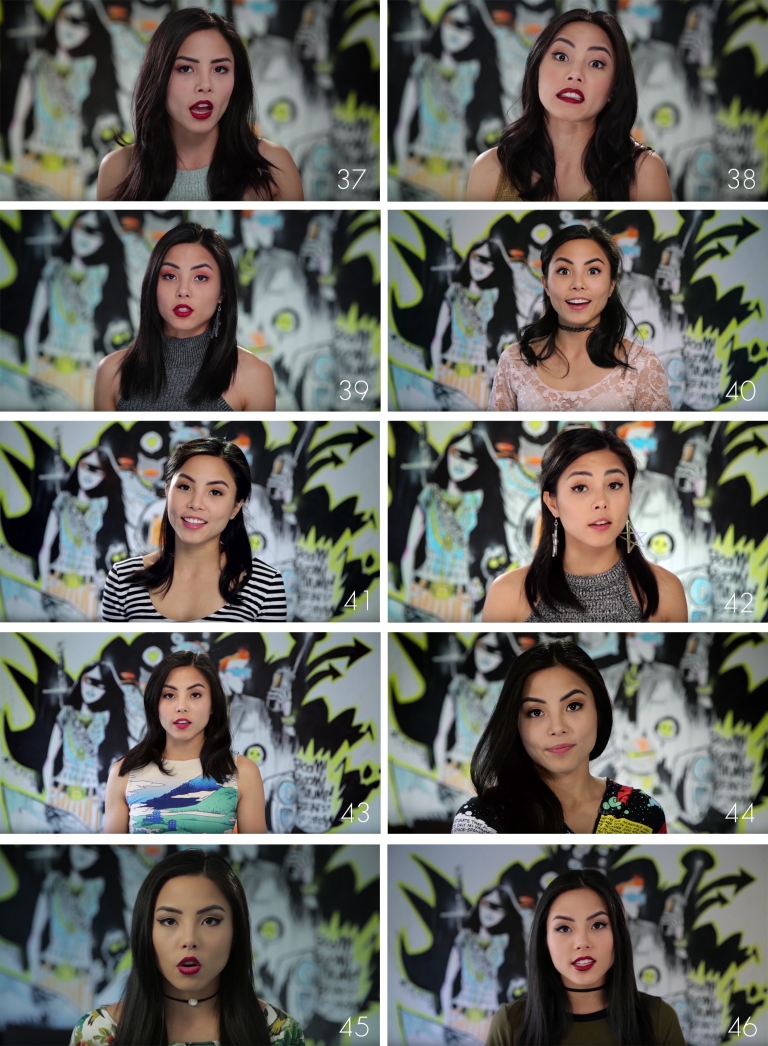
When you shoot the same setup more than 100 times, you start feeling the need to experiment a little. I’ll usually mix up one variable with every shoot, from the types of lighting units to lighting placement to contrast ratios to lenses to filters to gels to color grading. The goal is that from week to week, no one will notice much of a difference, but it’s pretty interesting to see all the frames back-to-back. I look back at some and wonder what I was thinking, but I suppose it’s all part of the process. The whole exercise has definitely made every subtle decision much more deliberate and precise.
Here are most of the setups we have done over the last four years, from newest to oldest. Which one is your favorite and why? Message me!
CAMERA: Canon 5d mkiii using L-series 24-105mm f/4 lens.
LIGHTING
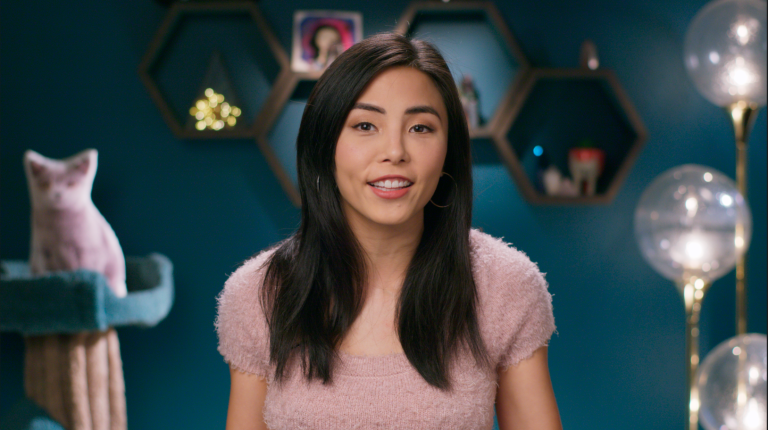
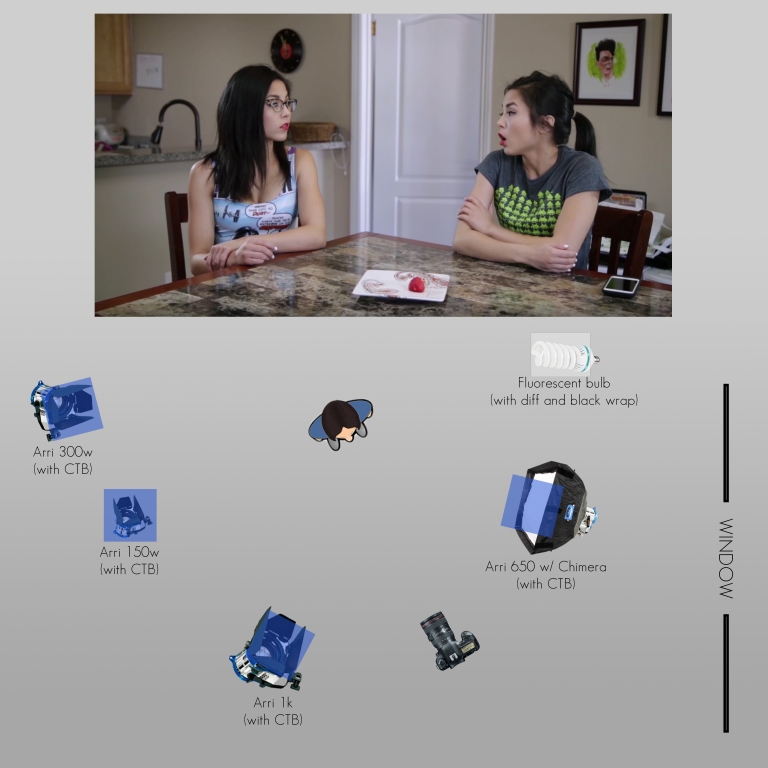
The “To Camera” Shot: this is a setup that Anna uses frequently, in which she directly addresses the audience. She likes a bright, saturated look. I achieve this by lighting her face evenly with soft light and making sure she’s slightly brighter than the background so she really stands out. It’s pretty dark in that corner, so it takes the whole kit plus a reflector to give the lady what she wants. I start by opening up all the windows to let in as much daylight as possible. Then I put Full CTB on all the tungsten fresnels so they match the daylight color temperature. I point the 1k at the ceiling just behind her to fill in the entire space with soft light. The 650 (with Chimera) lights her left side and the 300 bounces off a reflector for some soft, front fill that cuts the shadows from the 650 and 1k. I use the 150 as backlight, which augments the natural light from the window and helps with the sunnier feeling. (I also recently added those two fluorescents just because they were lying around. One softly backlights her left side and the other backlights the green Mario-portal-tube-cat-toy-thingy in the background, which helps add a little extra pop of color to the frame. I cover them both with black wrap to control where they hit. We used to do it without those lights, though, and it still looked great.)
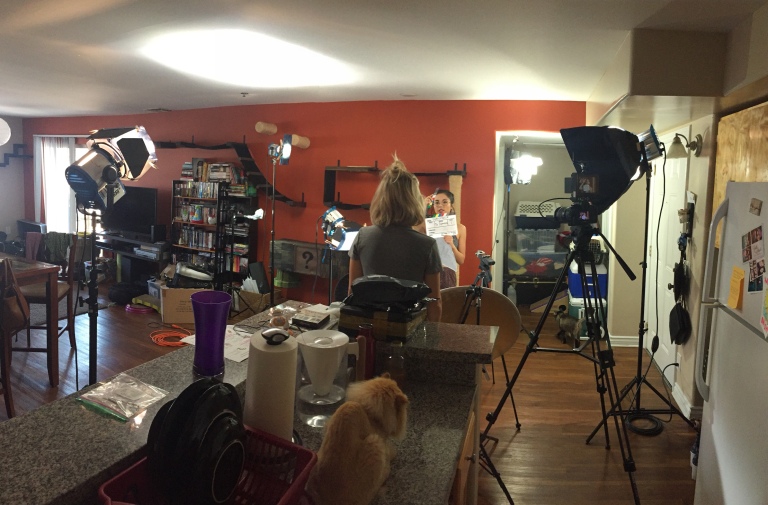
Real life version of above:
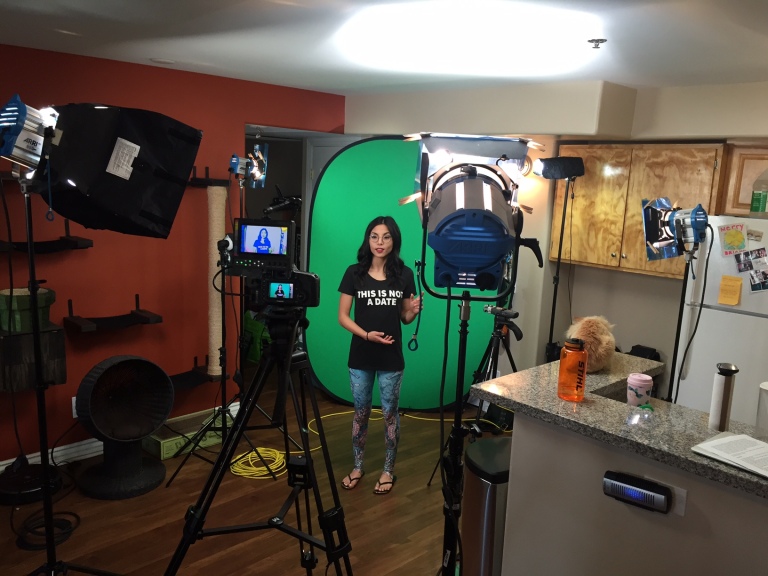
The “To Camera” Setup in person. It’s weird how many lights it takes to make it look like normal daylight on camera, right? Fun fact: Anna often slates herself…and runs sound…and acts…and directs…and produces…and writes. She’s a very organized mad-woman.
Another example of using the whole kit just to make it look like natural light. The 1k raises illumination and provides overall fill. The 650 is the key and the 300 is backlight. The 15o is brightening the background behind Anna’s head so it wouldn’t look like a black hole was about to swallow her alive. I added the fluorescent to brighten up the right side of the frame and hit the clone with some soft backlight, and I had to black wrap excess spill off the wall behind her.
Real life version of above:
GREEN SCREEN
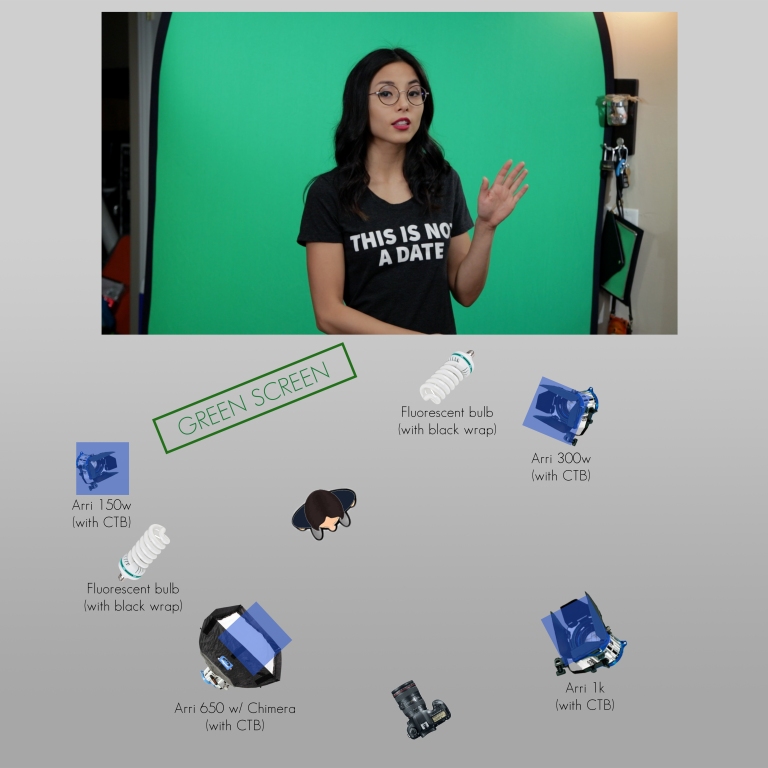
The Green Screen: another frequently-used setup in Anna’s world of wackiness. She occasionally likes to put herself into logistically unattainable environments, so we just do it digitally. The goal is to light the green screen as evenly as possible, which makes keying it out much easier in post. I figured out a way to do this with only three lights. The 300w lights the entire right side of the screen and I use the 150w and a fluorescent bulb to light the left side. Then I have three lights left for Anna. The 650w is her key light, the 1k is bounced into the ceiling for general fill and the other fluorescent bulb is giving her a little bit of backlight. Backlighting on green screen helps counteract green spill reflecting onto the actor. As you can see, the green screen she has is small and doesn’t fill the whole frame, so she has to make sure to keep her hands and legs inside the vehicle at all times and the rest is cropped out later. (“Inside the vehicle” obviously meaning, “within the bounds of the green area.”)I use false colors on my monitor to check exposure and see if the green screen is lit evenly. If it’s all one color, then I know it’s good to go. You might notice it gets slightly darker at the bottom, but we’re working with a limited setup and it still keys out nicely, so I let it slide. If you don’t know how to use false colors yet, I highly recommend learning. (Premiumbeat has a good tutorial.) You can see detailed, accurate results of your exposure and adjust if needed. Light meters, be gone!
The Real Life Version Of The Green Screen Setup:
Example Of A Final Composited Image:
From the Clone Epic Rap Battle video. We shot Anna solo against a green screen performing each clone part and the editor was able to easily layer them and add a cool background.
COLOR
For the apartment videos, I try to shoot them as close to the final product as possible so that very little color correction is necessary. This is because of tight turnarounds and the fact that I’m usually not involved in post for these. I use my Canon 5d mkiii on the Neutral picture profile with Sharpness 0, Contrast -2, Saturation -1 and Color Tone 0. I like the skin tones of the Neutral profile best. I lower the contrast to make it slightly flatter so that there’s more wiggle room to perfect in post, but still comes close to what I want. I lower the saturation because the Canon default is a little too intense for my liking.
UPDATE: Wow, things have changed quite a bit. Now that I shoot RAW on my C200, every video needs to be color graded. I’ve been using ACES in Davinci Resolve and I’m liking it a lot so far. It maps the log image to a pre-designed curve, which helps with consistency when making exposure decisions on set. It kind of reminds me of film, which is fun.
Screen grab from Davinci of the automatic curve applied when using ACES.ACES, straight out of camera.ACES, with color grade applied.
THE YOUTUBE SPACE LA
The Youtube Space is a great resource for content creators, giving us access to a lot of professional-grade gear for the cost of…our souls…Other than that, it’s free.
Anna and I have shot several videos together at The Space, but they usually involve way more equipment than one light kit. Here are some that we could get away with using fewer lights because we wanted a much more contrasty look:
“The Line Up”
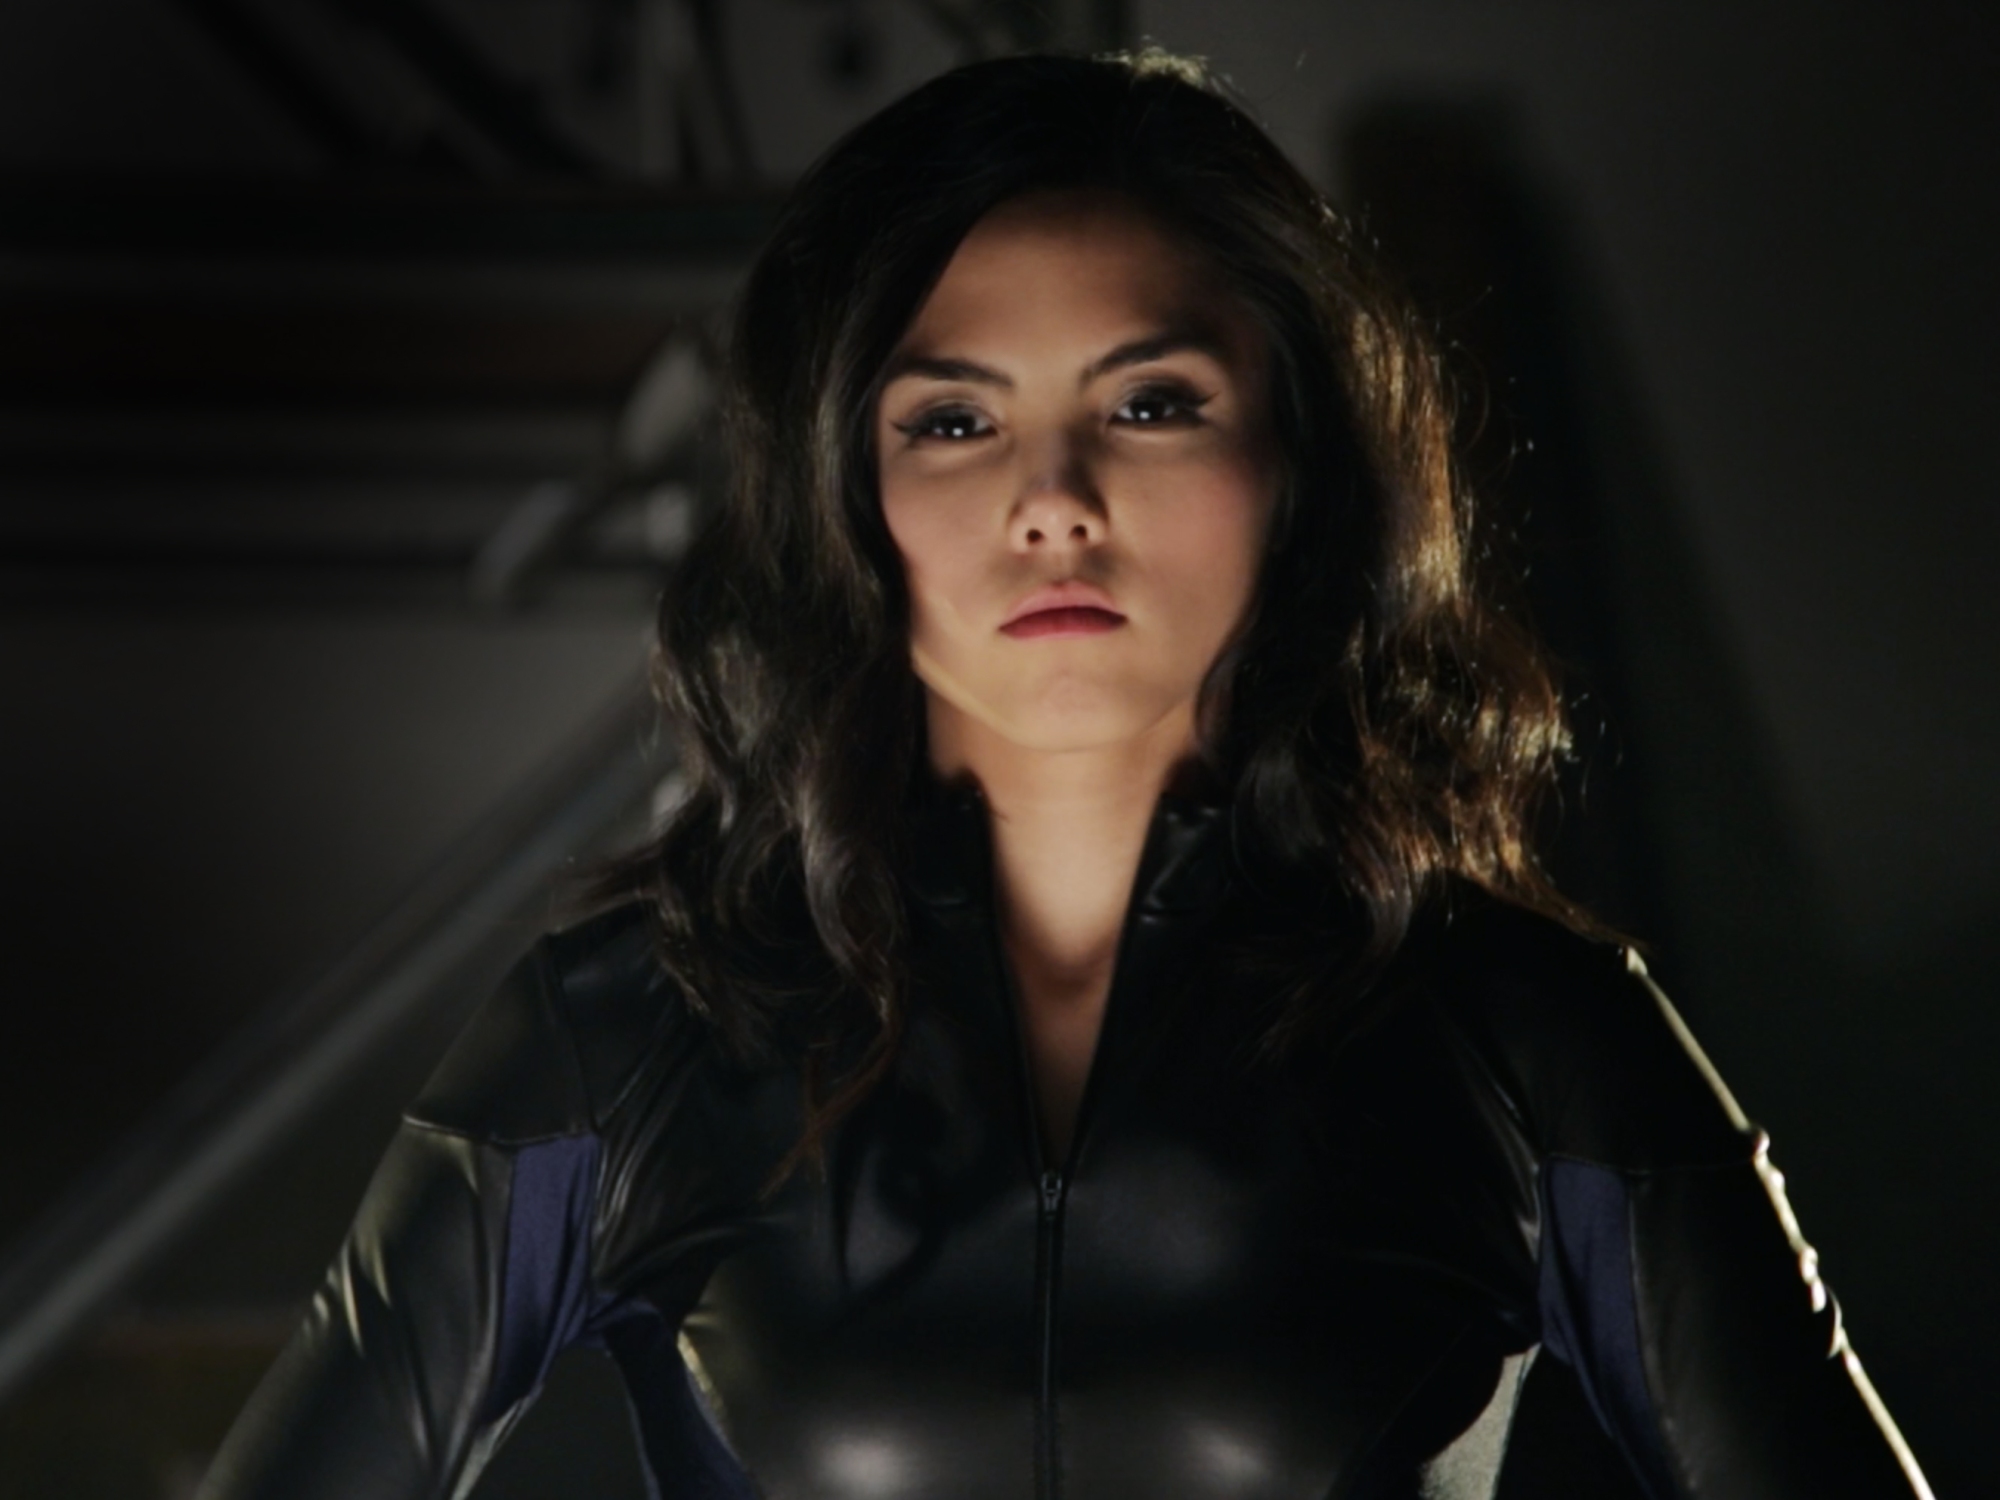
The shots with the men used a 1k (with CTB) as backlight, a fluorescent tube with diffusion in front of them and a 2K outside the door. Then we added the lamp in the background of the cop’s shot (played by Jake Weisman) to match the pop of warmth from the reverse. That tiny bit of warmth helps accentuate the fact that the rest of the room feels very cold, which reflects how the men feel after being rejected by their ladies. The ladies’ side of the room, however, is very warm with an orange overhead and magenta fluorescent in front of them to reflect their fiery personalities.
“How To Interrogate Your Boyfriend”
This was shot on the same day in the same room and I clearly went with similar color choices. The goal was a very dark interrogation room. I liked having a really orange overhead source, so I white balanced to 4400K to push it even warmer. My initial thought was to use blue coming through the window, but it wasn’t sitting right. My gaffer, Chelsea, recommended trying a “weirder” color since it was a dream scene and didn’t have to be realistic. I liked the idea, so I popped some purple on the 2K and blasted it through the window. Not only did that give us the cool slit effect from the blinds, but it added a nice shape in the corner of the room. As you can see in the top shot, I was able to frame the characters so that it did double-duty by lighting Anna and silhouetting Phil. Then I wanted smoke. I wanted smoke so bad. Some sweet-ass smoke would have made this sweet, sweet situation even sweeter. But the Youtube Space is very particular about the use of smoke machines and we didn’t even have one with us anyway, so I had to let it go. Fiiiiiiine. Still happy with the results. Not bad for two lights.
LESSONS LEARNED
I have noticed, when shooting daylight scenes at Anna’s apartment, that the more sources I add, the happier I am with the result. Sometimes I’ll set up a scene using just the 650 key and 1k for fill and it looks fine. It could pass as perfectly acceptable. But then I’ll bounce the 300 off my reflector for extra fill and, without adding too much for exposure, it really brings clothes and skin to life a lot more. Addingmore light adds more life. That can, of course, be difficult to adhere to when you’re only working with one light kit, but it’s something I have been thinking about.
Also, it’s a lot of subtle decisions combined that mark the difference between amateur and professional cinematography. It takes years and plenty of patience to learn all the variables and how manipulating each one affects the final feel of an image.
In this post and in others, Eric does an invaluable service by demystifying what many people consider to be daunting technical processes. Throughout this well-formatted site, he creates an elegant balance between aesthetic and practical concerns by using simple, easy-to-follow language in dialogue with useful visuals. He shows how you can get what you want by showing and telling how he and his collaborators got what they wanted. “One Light Kit…or Less” is an excellent resource.
I came across this post while searching up for set up inspiration and it was really helpful. It gave me a feel for what kind of mood I wanted my films to express and the equipment necessary for the production. Big thank you!
I can’t believe this exists on the internet for everyone to learn. True inspiration Eric! Can you please let me know what light was used for the hair light? I don’t see that in the post if I am not mistaken.
Great! Glad it’s helpful. The hair light in that setup was the 150w fresnel. In the newer setup that I currently use with Anna, we have picked up a few more lights so I switched it to a 300w because I wanted a little more punch.


In this post and in others, Eric does an invaluable service by demystifying what many people consider to be daunting technical processes. Throughout this well-formatted site, he creates an elegant balance between aesthetic and practical concerns by using simple, easy-to-follow language in dialogue with useful visuals. He shows how you can get what you want by showing and telling how he and his collaborators got what they wanted. “One Light Kit…or Less” is an excellent resource.
LikeLike
I came across this post while searching up for set up inspiration and it was really helpful. It gave me a feel for what kind of mood I wanted my films to express and the equipment necessary for the production. Big thank you!
LikeLike
Awesome! Glad to have helped.
LikeLike
I can’t believe this exists on the internet for everyone to learn. True inspiration Eric! Can you please let me know what light was used for the hair light? I don’t see that in the post if I am not mistaken.
LikeLike
Great! Glad it’s helpful. The hair light in that setup was the 150w fresnel. In the newer setup that I currently use with Anna, we have picked up a few more lights so I switched it to a 300w because I wanted a little more punch.
LikeLike